Showing posts with label gadgets; diy; crafts. Show all posts

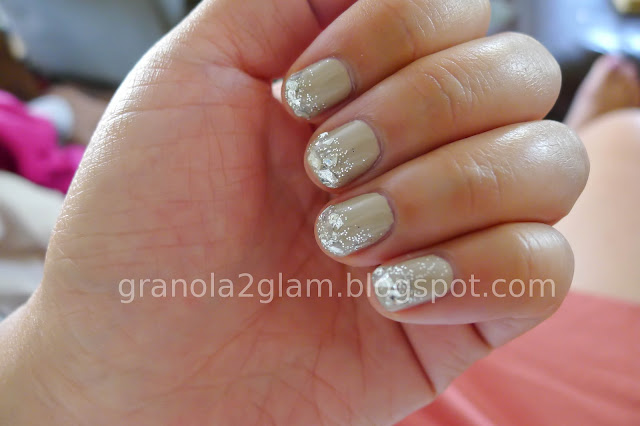
DIY Nude Blingy Manicure With OPI, Martha Stewart Glitter and Gelish


Hi Friends!

It's been awhile since I posted a DIY nail tutorial.  Here is a step-by-step tutorial of this Nude Silver Bling mani.


All products are linked within the tutorial below:

1.   Give yourself or get a standard manicure.

2.   Paint nails with 1 coat of your desired nail color. Here, I used OPI Did You 'Ear Me Van Gogh.

3.   Right after your 2nd coat of nail polish (on each nail), dip or apply with a sponge the silver Martha Stewart Leaf Glitter.

4.   Use a wood stick to press the edges of the foil down. They have a tendency to flip up, which will be a cause for annoyance later.

5.   Then sprinkle the silver glitter, emphasizing most of your coverage on the tips.

6.   Use blowdryer to dry and blow away loose glitter. 

7.   Apply 2 coats of your favorite top coat. I used Gelish Top It Off with a UV Lamp for my top coat.

I'm on day 4 and the manicure is still going strong.  I utilize Gelish top coat all the time with regular nail polish.  The trick is to ensure the polish is completely dry.  If you can, let it dry overnight.  If Gelish is applied to paint that isn't dry, you will find a soft ripply texture, as opposed to the hardened high shine finish.

Email me if you have any questions and please "Pin This" to share the love. 


Photobucket


Quick Pic of the Day: Nude and Sparkle Nails


Tutorial of this to follow.

Doesn't it remind you of this infamous Britney outfit?


Photobucket


DIY Colorful MacBook Washi Tape Keyboard Tutorial

Hi friends!
Mr. Granola recently got me the new MacBook Air so I could blog anywhere and be one of the cool kids with a Mac.  Transitioning from a PC, it took me awhile to get acquainted, but like they say, "Once you go Mac, you don't go back!"

Here's a step by step tutorial of this and this keyboard I've been swooning over for months:

1) Purchase various colors of washi tape.  I had no idea what washi tape even was until I looked into this DIY project.  It's basically thin (usually sheer) paper masking tape from Japan.  They come in all kinds of fun colors, prints, and even different widths.  I purchased mini rolls from Etsy; a) because of budget and b) because that's just a whole lotta tape!

Cute washi tape options:  here and here


2) The width of most of the wash tape fits exactly in width to the keyboard keys.  I did not use a ruler at all.  I literally, eyeballed the tape and cut it into squares.  There is a lot of tape to practice on and maybe you're more of a precise DIY'er, but for me, I literally just winged it!


3)  Like I said, without doing any measurements, you can pretty much guestimate the length needed.  Checking out the close up pic below, you can definitely see some variation from key to key.


4)  To prevent lifting, I purchased this amazing keyboard cover from Amazon.  I've tried many silicone keyboard covers for various laptops, but hands down this is the best cover for this project.


5) Once the keyboard cover is set, you are  GOOD TO GO!  And that's pretty much it!


Here are some pics with the clear keyboard cover on top:


Exact keyboard cover:


I have a backlit keyboard with black keys and I think the tape looks fine.  During the day, you may need to double check your icons if you don't have every single key memorized.  As for me, it's probably just because I'm new to Mac and will eventually get better acquainted with the keyboard shortcuts.

Of course this project would work perfect for white keys too.

Feel free to leave a comment if you've done this or have any questions.
Photobucket


LinkWithin

Related Posts Plugin for WordPress, Blogger...